Coconut Dream Tart

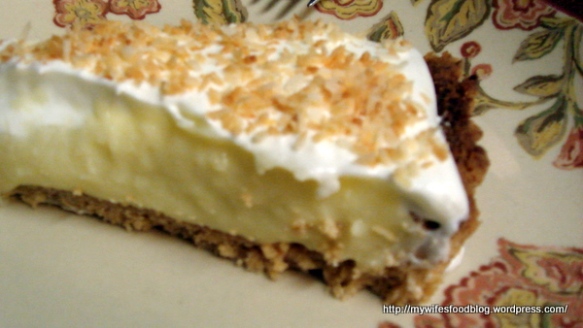
The rules for my wife’s birthday are simple: she tells me what she wants me to make, and I make it. She found this recipe weeks in advance and was counting the days to her birthday because of it. Not because it was her birthday and she was going to get presents and all that.

I never knew coconut came in so many different forms! And I love coconut. And so does my wife, obviously, or she wouldn’t have asked me to make this. It may appear complicated, but it really is simple to make.

Coconut Dream Tart

Coconut Dream Tart

adapted from Once Upon a Chef

Ingredients

Crust:

  • 7½ oz shortbread cookies such as Walker’s Pure Butter Shortbread, finely ground [if you don’t have a baking scale, it’s 11 Walker’s rectangular cookies; you’ll need 2 boxes]
  • 1¼ cups loosely packed sweetened flaked coconut
  • ½ stick (¼ cup) unsalted butter, melted

Custard:

  • 2 large eggs
  • 2 large egg yolks
  • ¾ cup granulated sugar
  • 2 tablespoons all-purpose flour, packed
  • 2 tablespoons corn starch, packed
  • pinch salt
  • ½ teaspoon coconut extract
  • 5 tablespoons cream of coconut (stir well before using) [This comes in a can, and it’s weird: when cold, it congeals so that it looks kind of like wax. Submerge the can in hot water for a while to turn it back to a liquid.]
  • 1 cup coconut milk (stir well before using)
  • 1 cup whole milk
  • 3 tablespoons unsalted butter

Topping:

  • 1 cup heavy whipping cream
  • 3 tablespoons sugar
  • splash coconut extract
  • ¾ cup unsweetened coconut flakes, toasted in a skillet until golden and cooled

Directions

Crust:

Adjust oven rack to middle position and preheat to 350℉.

Pulse cookie crumbs, coconut, and melted butter in a food processor until coconut is finely ground. Using a ½ cup dry measuring cup, press crumbs firmly and evenly into bottom and up sides of 10-inch tart pan with removable bottom. Bake until golden, about 15 minutes, then cool completely in pan on a rack (you can speed this up in the fridge or freezer). If it shrinks or cracks a bit, simply press it back together and up the sides while it’s still hot.

Custard:

Whisk the eggs, egg yolks, sugar, flour, cornstarch and salt in a medium bowl and set aside.

Combine coconut extract, cream of coconut, coconut milk and whole milk in a medium saucepan and bring to a boil. Turn off heat. Whisking constantly, slowly ladle about a cup of hot milk mixture into egg mixture; whisk well to combine. Whisking constantly, gradually add remaining milk mixture to egg mixture in 3 or 4 additions; whisk well to combine. Return mixture to sauce pan. Over medium-high heat, cook, whisking constantly, until mixture reaches a boil and thickens, about 2 minutes. Filling must boil for at least 30 seconds in order to fully thicken. Off heat, whisk in butter until fully incorporated.

Pour hot filling into cooled pie shell and smooth surface with spatula; press plastic wrap directly against surface of filling and refrigerate until firm, at least 3 hours and up to 10 hours.

Topping:

Up to 3 hours before serving, beat cream, sugar and coconut extract with electric mixer until soft peaks form, about 2 minutes. Top tart with whipped cream and sprinkle with cooled toasted coconut.

Carefully remove the rim from the pan by gently pressing upwards on the bottom while holding the rim in place. Cut into wedges, wiping your knife clean between slices, and serve cold.
Coconut Dream Tart

German Apple Pancake

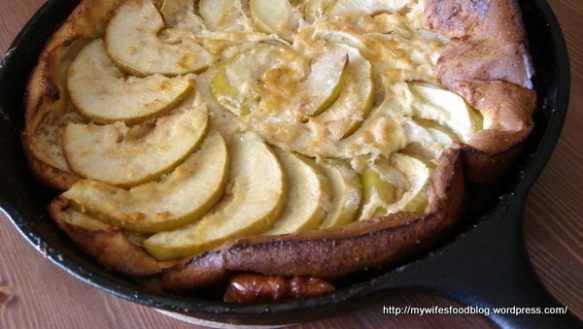
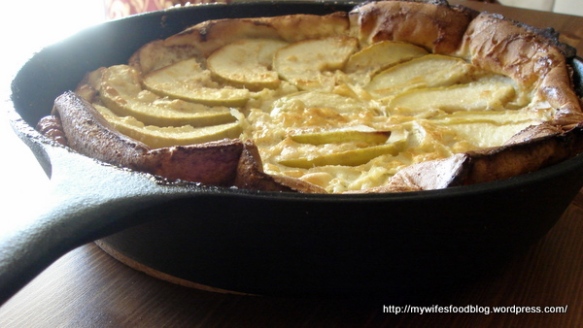
I was looking through some old photos and came across these. My wife and I tend to take photos of food before we eat it, even when we don’t know how good it will be. I find it hard to believe I passed on this recipe for the blog, because I remember enjoying it.

I love a nice tart apple! I love a nice fluffy pancake! I am partial to Germans, as well (just don’t mention the war). I just couldn’t miss with this recipe.

German Apple Pancake

German Apple Pancake

adapted from Abby Mandel, Cooking Light, August 2008

Ingredients

  • ½ cup all-purpose flour
  • ½ teaspoon baking powder
  • 1 tablespoon granulated sugar
  • ⅛ teaspoon salt
  • ⅛ teaspoon grated whole nutmeg
  • 4 eggs, room temperature
  • 1 cup fat-free milk
  • 2 tablespoons butter, melted
  • 1 teaspoon vanilla extract
  • Cooking spray
  • ½ cup granulated sugar, divided
  • ½ teaspoon ground cinnamon
  • ½ teaspoon grated whole nutmeg
  • 1 cup thinly sliced Granny Smith apple
  • 1 tablespoon powdered sugar

Directions

To prepare batter, lightly spoon flour into a dry measuring cup; level with a knife. Combine flour, baking powder, 1 tablespoon granulated sugar, salt, and ⅛ teaspoon nutmeg in a medium bowl, stirring with a whisk. Whisk together eggs, milk, butter, and vanilla in a small bowl. Whisk egg mixture into flour mixture. Let stand 30 minutes.

Preheat oven to 425℉.

To prepare apple mixture, coat bottom and sides of a 10-inch ovenproof skillet with cooking spray. Combine ¼ cup granulated sugar, cinnamon, and ½ teaspoon nutmeg; sprinkle evenly over bottom and sides of pan. Arrange apple in an even spokelike layer in pan. Sprinkle apple with remaining ¼ cup granulated sugar. Cook over medium heat 8 minutes or until mixture bubbles. (Be careful not to overcook apple-sugar, or pancake will be difficult to remove from pan after baking.) Slowly pour batter over apple mixture.

Bake at 425℉ for 15 minutes. Reduce oven temperature to 375℉ (do not remove pancake from oven); bake an additional 13 minutes or until center is set. Carefully loosen pancake with a spatula. Gently slide pancake onto a serving platter. Sift powdered sugar over top. Cut into 6 wedges; serve immediately.

German Apple Pancake

Crème Brûlée

I hope you enjoy those accents in the title, because I don’t know when we’ll see them again.

My wife loves crème brûlée, but all the recipes she has seen look daunting. Simmer things on the stove, then bake them in the oven in a water bath, hot ramekins, tongs, &c. — too many opportunities to go wrong.

But one of the things my wife brought to this marriage was a kitchen torch that she and her mother found on the clearance rack at Target years ago. The torch went unopened and unused until last night.

So it came down to New Year’s Eve 2010, and we were planning to have an early dinner out at La Madeleine, when my wife suggested we overcome our fears and make some crème brûlée for dessert.

Then she got out the kitchen torch (still in the box!), and realized that there was a recipe on the back of the box, and it looked too easy to be true (no oven! no water bath!), so we went for it.

I think we just found ourselves a new tradition.

Crème Brûlée

from Wilton Cake

Ingredients

  • 4 egg yolks
  • 2 Tbs white sugar
  • 1⅓ cups whipping cream
  • pinch of salt
  • 1 tsp vanilla extract
  • 1 Tbs sugar (turbinado or white) for topping

Directions

Beat egg yolks in medium bowl with electric mixer on high speed until thick and light yellow, about 5 minutes. Gradually beat in sugar.

Heat cream and salt in small saucepan over medium heat just until hot to the touch. With mixer running, slowly pour half the cream into the egg mixture; stir egg mixture back into the remaining cream in the saucepan (tempering eggs).

Cook over low heat, stirring constantly, until mixture thickens, 5-10 minutes. Do not boil!

Remove from heat; stir in vanilla. Pour into ceramic dishes. Cover and refrigerate at least 2 hours. Do not let plastic wrap or foil cover touch the surface of the custard.

Before serving, sprinkle ½ Tbs sugar (turbinado or white) onto each dessert and gently broil tops with kitchen torch until sugar is melted and slightly brown. You can eat them now or put them back into the fridge for up to 30 minutes before serving.

Roasted Vegetable Pie

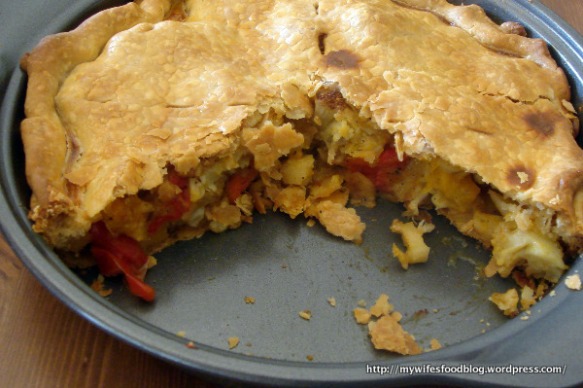
If there is a piecrust on top and a piecrust on bottom, it rarely matters what is in between, especially when my wife is the one doing the cooking. I make no exception for this vegetable pie.

Back when we were getting strange vegetables in a box every other week from the community-supported farm, my wife would often make recipes like this. They usually involved funny-sounding vegetables such as “bok choy” and “kohlrabi”. This recipe really helped us get back to our roots.

Roasted Vegetable Pie

Roasted Vegetable Pie

from Family Circle magazine, March 2010

Ingredients

  • 1 small cauliflower, cut into florets, about 4 cups
  • 1 small butternut squash, peeled and cut into 1-inch pieces
  • 2 medium parsnips, peeled and cut into ½-inch pieces
  • 1 cup baby carrots [pssst: normal carrots cut to the size of baby carrots work just as well]
  • 1 sweet red pepper, cut into 1-inch pieces
  • 2 tablespoons olive oil
  • ½ teaspoon salt
  • ½ teaspoon black pepper
  • 1 cup vegetable broth [I suspect chicken broth would make it even better, but I don’t want to offend the vegetarians]
  • 1 tablespoon cornstarch
  • ¾ teaspoon dried thyme
  • ¾ teaspoon dried oregano
  • 2 tablespoons plain bread crumbs
  • 1 package (15 ounces) refrigerated rolled piecrusts [though you are allowed to make your own crusts if you want to go the extra mile]
  • 2 tablespoons grated Parmesan cheese
  • 1 egg beaten with 1 tablespoon water [you really only need a little bit of this, so if you can figure out how to crack just half an egg, please let me know]

Directions

Heat oven to 450℉. Line a large baking pan with aluminum foil.

In a large bowl, add cauliflower, squash, parsnips, carrots, and red pepper. Toss with olive oil and ¼ teaspoon each of the salt and pepper. Spread out on the baking pan in a single layer. Bake at 450℉ for 30 minutes, stirring after 15 minutes.

Meanwhile, place the broth in a medium-size saucepan and stir in the cornstarch. Bring to a boil, lower heat and simmer 1 minute until thickened. Stir in the thyme, oregano, and remaining salt and pepper. In a large bowl, gently toss roasted vegetables, bread crumbs and sauce.

Fit one of the piecrusts into a deep-dish 9-inch pie plate. Sprinkle 1 tablespoon of the cheese over the bottom. Spoon in vegetable mixture and sprinkle with remaining 1 tablespoon cheese. Place the second piecrust on top and crimp crusts together. Pierce a few times with a paring knife to vent. Brush lightly with the egg-water mixture.

Bake at 450℉ for 15 minutes. Lower heat to 425℉ and bake for an additional 30 minutes. Remove from oven and allow to cool slightly before slicing and, um, devouring.

Honey-Glazed Spago Corn Bread

My wife loves corn bread. She makes it for us all the time. Two years ago, at our church’s Chili Cook-off, my wife entered into the contest a corn bread recipe she had never tried. It turned out to be a terrible recipe.

Last year, we kept away from the corn bread and only made chili and cobbler. You may recall that my chili won an award, but don’t bother with the congratulations; that was the year of “everyone wins an award.”

This year the contest sensibly returned to bestowing awards that mean something, and my wife returned to corn bread with the fancifully-named Honey-Glazed Spago Corn Bread. Unfortunately, the judges only awarded prizes to the chili this year.

Turns out that decision was fortunate for everyone else that brought corn bread! Because there is no way this corn bread would not have taken home the gold medal and the blue ribbon and the first prize. There is a reason it comes from a recipe book with “desserts” in the title.

Honey-Glazed Spago Corn Bread

from Desserts by the Yard via Food Gal

Ingredients

Corn Bread:

  • 1 cup yellow cornmeal
  • 1¼ cup all-purpose flour
  • 1 cup sugar
  • 2 tablespoons baking powder
  • 1½ teaspoons salt
  • 4 large eggs, at room temperature
  • 3 ounces (¾ stick) unsalted butter
  • ⅓ cup vegetable oil
  • 1 cup milk
  • ½ cup buttermilk

Glaze:

  • 3 ounces (¾ stick) unsalted butter
  • ¼ cup honey
  • ⅓ cup water

Directions

Place a rack in the middle of the oven and preheat the oven to 350℉. Line a 9×13-inch baking pan with aluminum foil and spray foil with pan spray.

Sift together cornmeal, all-purpose flour, sugar, baking powder, and salt two times. Set aside.

In a medium bowl, whisk eggs. Melt 3 ounces of butter and immediately whisk into eggs in a slow stream. Whisk in oil, milk, and buttermilk. Whisk in dry ingredients just until combined.

Scrape batter into the pan and bake for 30 minutes. Rotate pan from front to back and continue to bake for 10 minutes, or until a tester inserted in the center comes out clean.

While corn bread is baking, melt 3 ounces of butter in a medium saucepan. Add honey and water, and whisk until blended.

When corn bread is done, remove from oven and poke holes all over the bread, about ½ inch apart, with a toothpick. Brush with the glaze and allow to cool.

Don’t forget, you just made 117 square inches of corn bread heaven. Share it with your friends.

Rosemary Asiago-Laced Bread

When you say that something is “laced” with something else, it sounds mysterious and dangerous (dangeresque?). Drugs are usually involved. Or alcohol. I can assure you that there is nothing mysterious, dangerous, druggy, or alcoholic about this bread. What there is is something delicious and cheesy.

Yes, there is definitely something cheesy about this bread.

Also, I take back the part where I said this bread is not mysterious or dangerous. It is mysteriously, dangerously cheesy.

Rosemary Asiago-Laced Bread

from Family Circle Magazine, December 2009

Prep time: 10 minutes, plus kneading
Serves: 12 slices

Ingredients

  • 1 package active dry yeast
  • 1¼ cups warm water
  • 2 tsp sugar
  • 4 to 4¼ cups all-purpose flour
  • 2 tsp salt
  • 2 tsp chopped fresh rosemary
  • 2 tsp dried minced onion
  • ⅛ tsp cayenne pepper
  • 2 Tbsp olive oil
  • ½ cup shredded Asiago cheese
  • ½ cup shredded Parmesan cheese
  • 1 egg, beaten with 1 Tbsp water

Directions

Sprinkle yeast over ¼ cup of the warm water (105℉) in a glass measuring cup. Stir in 1 teaspoon of sugar. Let stand for 10 minutes. Mixture will be foamy. Stir together 3½ cups of flour, salt, rosemary, minced onion, cayenne pepper and remaining teaspoon of sugar. Pour yeast mixture into flour mixture. Add remaining 1 cup of warm water and the olive oil. Stir to form a ball. Mix together the cheeses and add ¾ cup to the dough.

Turn out onto a well-floured surface. Knead for 10 minutes, adding additional flour as needed until dough is smooth and elastic. Lightly grease a large bowl with olive oil. Place dough in a bowl and turn to coat. Cover with plastic wrap and let rise in a warm place for 1½ hours, until doubled in size. Punch dough down.

Roll out dough into a 20×8-inch rectangle on a lightly floured surface. Roll up from a short side. Fold ends under loaf and place seam-side down in a greased 9x5x3-inch loaf pan. Loosely cover with plastic wrap and let rise in a warm place for an additional hour.

Heat oven to 400℉. Brush top of loaf with egg wash. Sprinkle with the remaining cheese. Bake at 400℉ for 35 minutes or until loaf sounds hollow when tapped. Remove from pan to rack to cool.

Notes

My wife combined white whole wheat and all-purpose flour, and it worked very well. Since she didn’t have dried onions, she added a teaspoon of Italian seasoning.